
Happy Holidays!
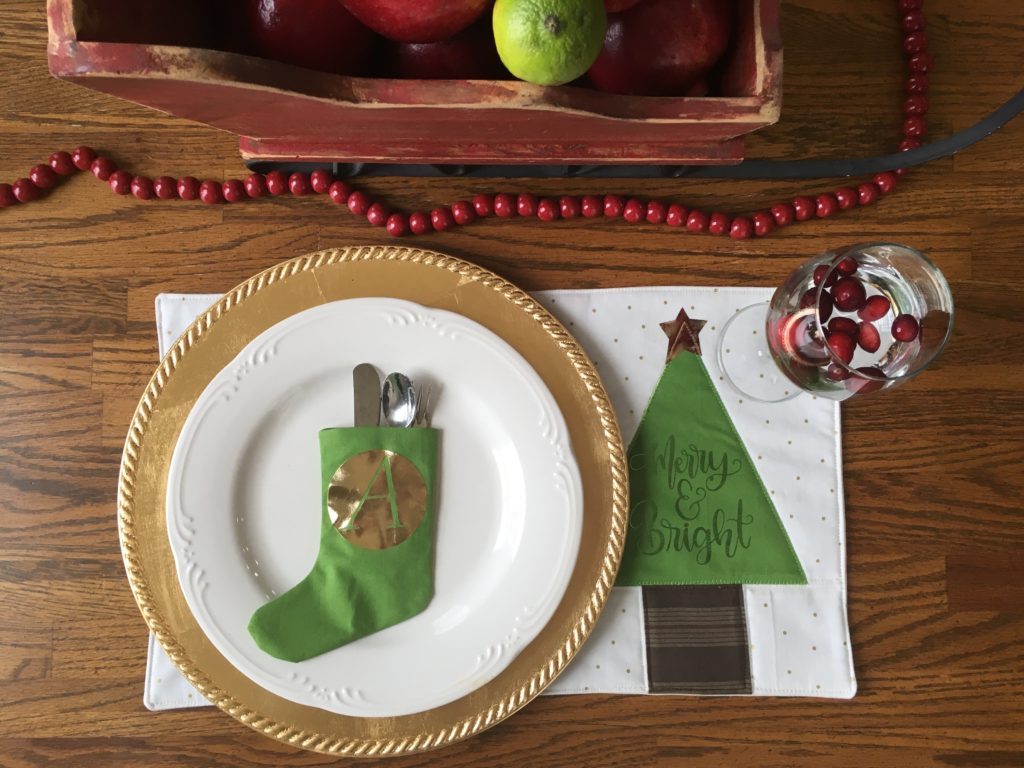
Every year at this time, I wish I had some fun things for my Holiday table. I got ambitious and decided to make some holiday placemats. It is so much easier to do these types of projects with my Cricut Maker. It cuts fabric out so precise and handles any little intricate vinyl iron on pieces with ease. I do not have any computer graphic or design skills so using Cricut’s design space is a life saver. It made the process go so quickly.
Let’s jump right in to the project.
Materials:
Cricut Design Space – DIY Holiday Placemat
Iron On – You can use whatever colors you like. Feel free to change it up. I used gold foil for star, green foil for merry and bright
1-2 Standard Grip Mats: I like having more than one so you can load another color while one is cutting.
1 yard of the Main Fabric Section
4″ X 4″ brown fabric for tree stump
7″ x 8″ green fabric for tree
1/2 yard of 100% cotton batting
Weeding Tools: So much easier to weed those tiny pieces with the proper tools.
Easy Press 2: this is optional, but being able to set a proper temperature and have a built in timer really is helpful. If you don’t have an Easy Press you can always use your iron – no steam.
Let’s Begin
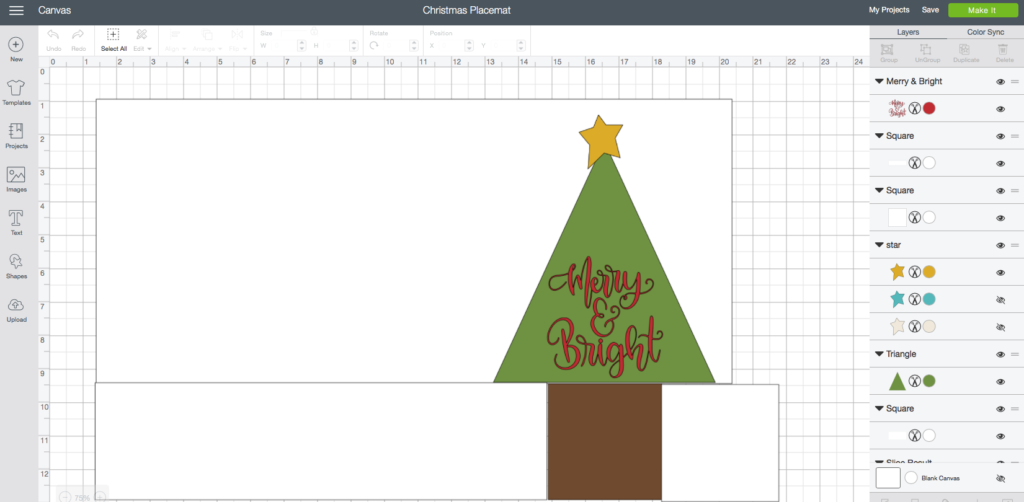
First, open the project in design space and cut all the pieces out. Be sure to remember to change your cutting medium from fabric to iron on, and change your rotary blade out when moving to the vinyl iron on.
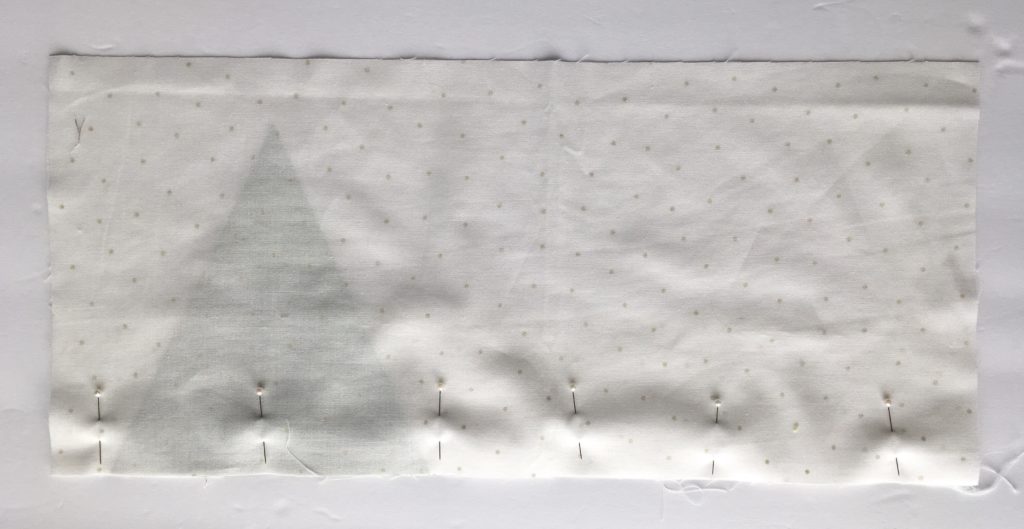
NOTE: I know the bottom does not match up on the picture, the extra is due to seam allowance when sewing. If it was the same, the pieces would end up being the wrong size.
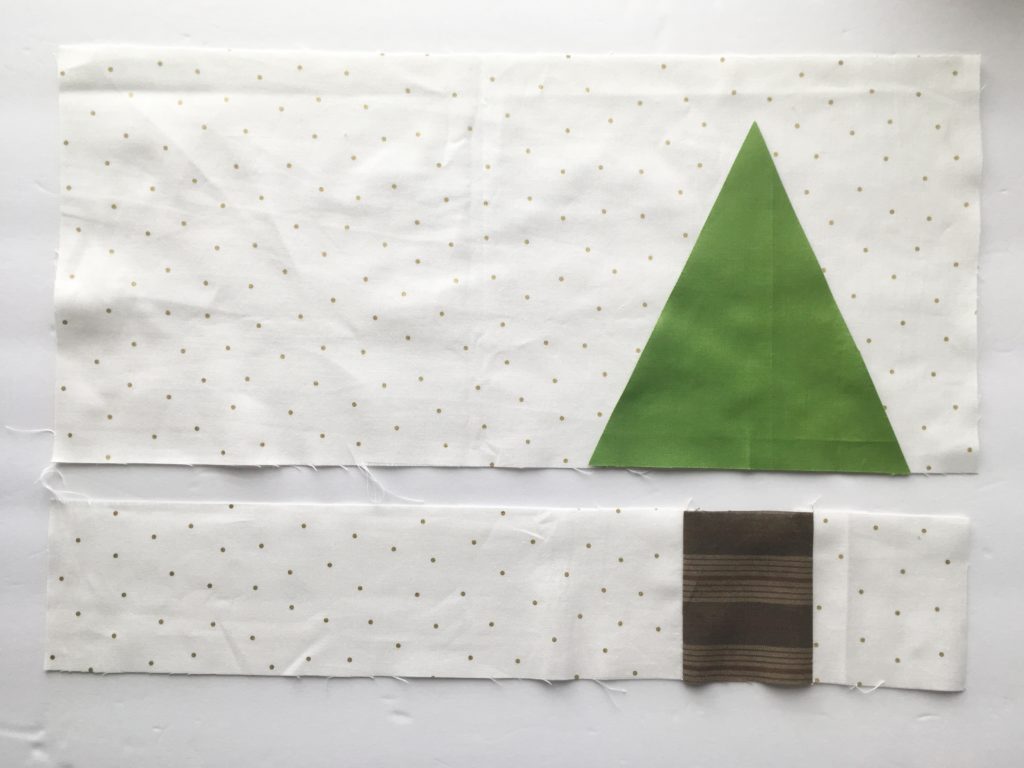
Once your pieces are cut, you need to sew the bottom row together.
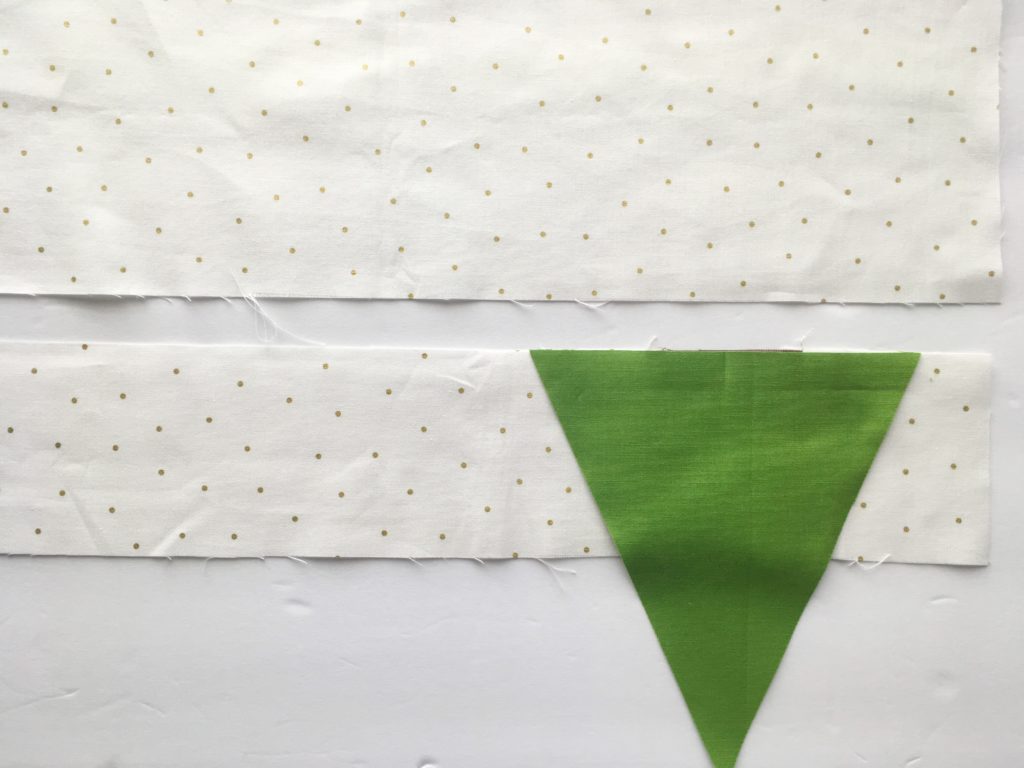
Next, you want to center the tree over the brown stump.
Then place the top white piece on top of the bottom row and tree. Pin so it stays together. Sew together.
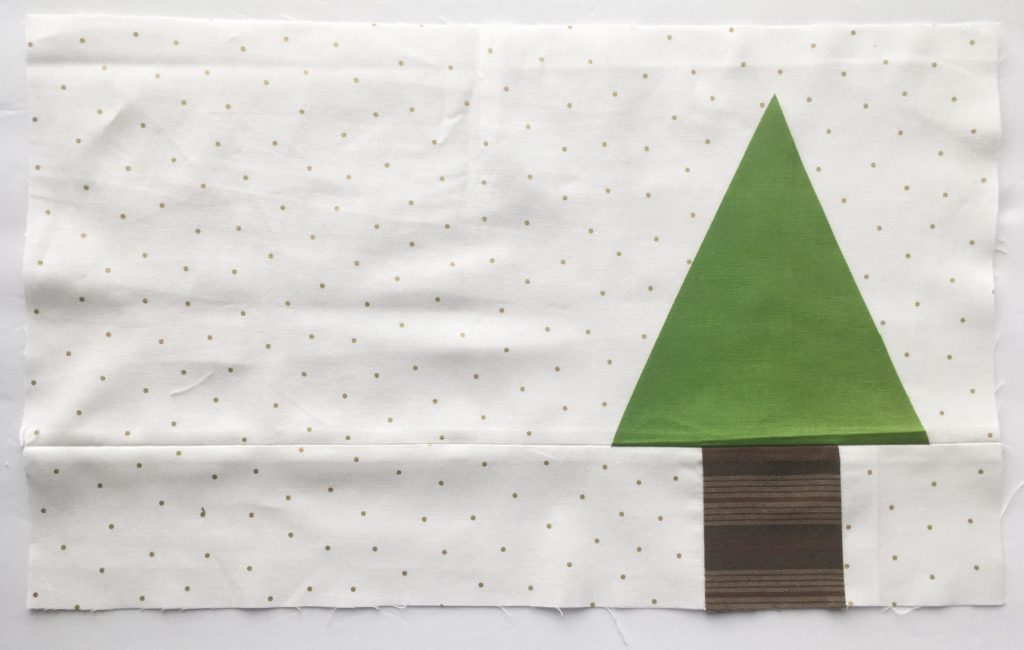
Your project should look like this. Cut the back fabric the same size as your front. Layer your project front piece batting and back piece wrong side up. Sew around all edges leaving a 2″ opening so you can turn.
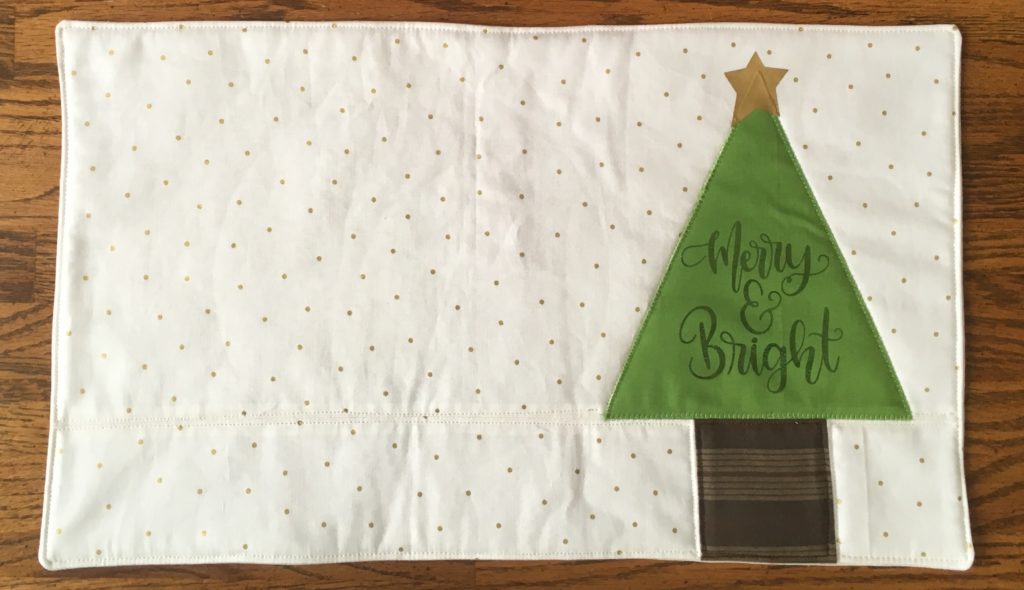
I sewed around the mat to give a quilted look and used a decorated blanket stitch around the tree. You could also just sew it with a straight stitch. Add your vinyl and you are done!
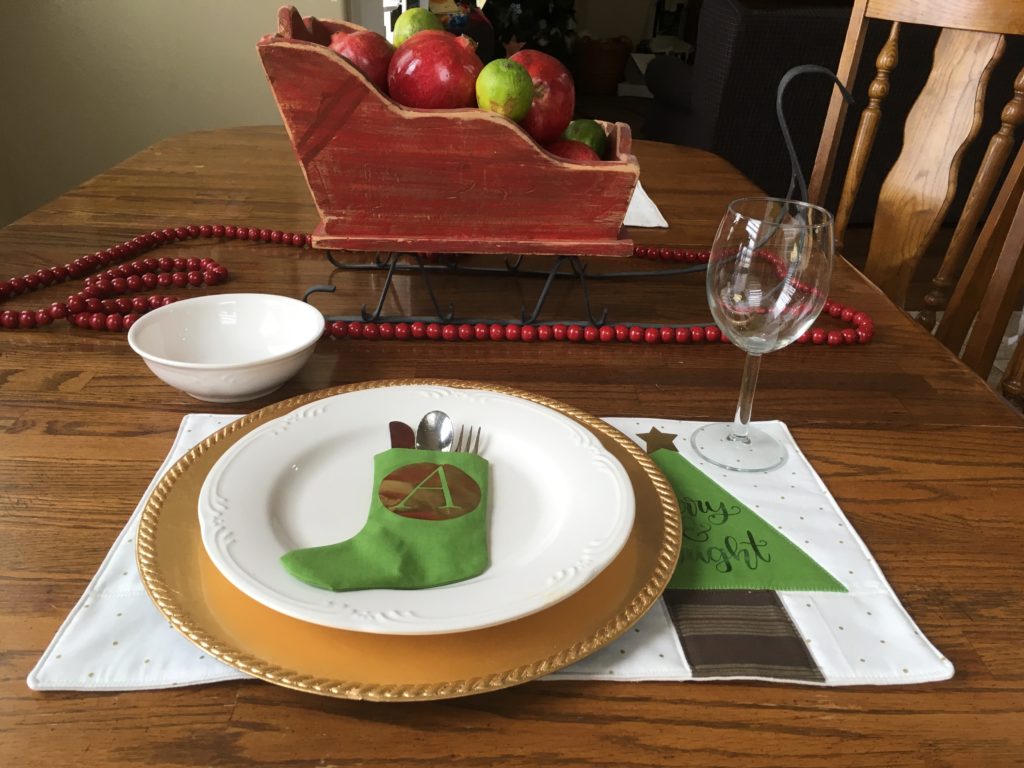
This is such a fast and easy project, you can cut all the pieces out at once and I love the way it brightens up your holiday table. I’d love to see your holiday placemats send me an email or leave a picture in the comments. Thanks for following along.
This is a sponsored conversation written by me on behalf of Cricut. The opinions and text are all mine.

Those are so cute!! Just perfect for christmas!
Thank you! I am pretty excited about them
Stop it!! This is just darling!!
Thanks Jessica!