I am so excited to announce that I paired up with Cricut for a sewing blog tour. I have to pinch myself that I was included with an amazing group of talented people. Be sure to check all of them out to see other projects you can create with your own Cricut Explore Air 2. Also, make sure you sign up for the giveaway link at the end of the post.
This experience is based strictly on my opinion. Others may have a different opinion or experience with the product listed above. I was provided the sample free of charge by the company or PR agency and I have given my honest opinion.
This is a sponsored conversation written by me on behalf of Cricut. The opinions and text are all mine.
I have to admit that I am technically challenged, could be my 5 kids or my crazy life, but I have a love/hate relationship with my computer and all the techie items that have crept into my life. I was admittedly nervous about using the Cricut, but trust me when I say – it is so EASY. Way easier than I thought it would be. I am happy to report that my first project worked! There are so many things you can do using the Cricut. Be sure to check out the other bloggers that participated in this tour.
Sewing the Make-up bag and bonus Eye Mask are pretty easy – good news: you can use fabric scraps. I love making bags and have a stash at home, they make the perfect last minute gift. With my Cricut Explore Air 2, it makes it so nice to personalize or add some cute designs which give it a little something extra.
You can purchase your own Cricut Explore Air 2 by clicking here. Be sure to enter the code ChristmasinJuly for free shipping (US only).
The Eye Mask is easy to make because with the perfect mask cut out in Cricut’s Design Space. You can find it here. Search for Mask #M39810 Girls Makeup Party. You can use the Cricut to cut your fabric – but I am trying to figure out how to remove the holes from the pattern. Once I learn, I will let you know. Until then, cut out using a heavy card stock and use it as a pattern to trace onto your fabric and cut by hand.
DIY Tutorial
Make-Up Bag I modified the tutorial I found here from Lil Luna
My modification include: vinyl fabric on the inside for easy clean up and using two different fabrics on the outside because I like the look better and it’s uses more fabric scraps. Also, adding the Iron On and design from Cricut’s Design Space really makes it special.
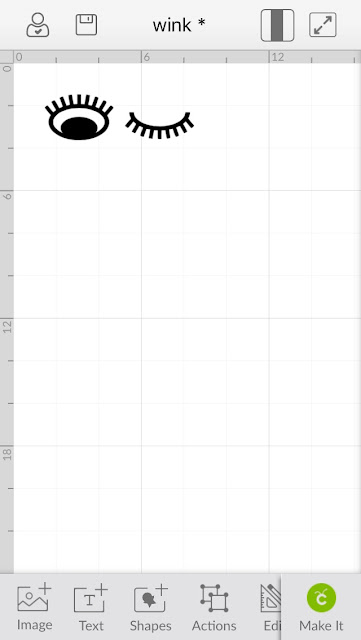
Upload the Eyes Here: You have three options 1. Winking 2. Open 3. Closed
1. Open Design Space. Download your eyes. You can also use any of the over 60,000 images that are available.
2. Begin Cutting – don’t forget to mirror image and place the pretty side down of your Iron On material on your cutting mat
3. Weed your project – which is super easy for this one because of all the simple lines. However, on a side note – you can cut precise detailed images and they weed like a dream.
4. Follow the directions for Cricut’s Iron On to get application. Some carrier sheet need to cool before they are removed from your project.
Eye Mask
Cricut Mask #M39810
Download Your Eyes (see above for link)
2 – 5″ X 9″ fabric scraps
2 – 4″ X 9″ Fusible Fleece
1 – 13″ 1/4 elastic
1 – 2″ X 16″ fabric scrap
Step One: Cut out all fabric and fusible fleece
Step Two: Cut out strap and sew together wrong sides. Turn right side and thread elastic through. I like to use a safety pin on the elastic the thread through easily.
Step Three: Sew the elastic to ends of fabric so it doesn’t get lost! Super important step.
Step Four: Place one side of mask wrong side down. Line up strap and pin in place.
Step Five: Place second fabric right side down and pin in place. When I made this mask – I only used one piece of fusible fleece…I would definitely recommend using two – it makes a much cozier mask.
Step 6: Sew around edges. Make sure you leave a 1.5″ – 2″ hole to turn the fabric. Turn right side and sew a scant 1/4″ around the edge of mask. Add your favorite eyes. You’re done!
#SewWithCricut #CricutMade #Cricut #Ad
Enter to Win a Cricut Explore Air 2 HERE
Week One: July 19th
Week Two: July 26th
I was invited to participate in the Cricut Party Blogger Program Kickoff. This experience is based strictly on my opinion. Others may have a different opinion or experience with the product listed above. I was provided the sample free of charge by the company or PR agency and I have given my honest opinion.This is a sponsored conversation written by me on behalf of Cricut. The opinions and text are all mine.


Recent Comments